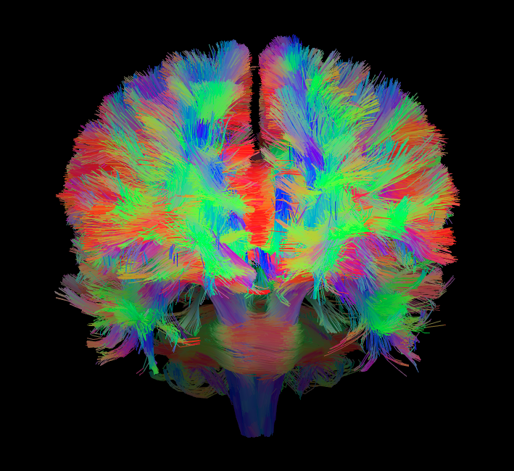
Introduction to dMRI

Information
The estimated time to complete this training module is 3.30h.
The prerequisites to take this module are:
- the installation module.
- the introduction to the terminal module.
If you have any questions regarding the module content please ask them in the relevant module channel on the school Discord server. If you do not have access to the server and would like to join, please send us an email at school [dot] brainhack [at] gmail [dot] com.
Resources
This module was presented by Davide Momi during the of Neuroimaging Carpentry workshop series, and the associated notebooks are available here.
The video of the presentation is available below (duration 1h33).
Tutorial
This tutorial uses Jupyter notebooks. Follow the instructions to install the necessary dependencies in a virtual environment.
Clone this repo using:
git clone https://github.com/Davi1990/Intro_to_dMRI_workshopCreate an environment in the cloned repository:
cd Intro_to_dMRI_workshop
virtualenv env
To activate the environment, use the following command in
Intro_to_dMRI_workshop/source env/bin/activateIn the activated environment, install the dependencies and jupyter-lab:
pip install -r requirements.txt
pip install jupyterlab
Finally download the necessary data from OSF. Data from a single subject that’s used in this tutorial is available and can be downloaded by running:
mkdir ./data
cd data
osf -p cmq8a fetch ds000221_subject/ds000221_sub-010006.zip
unzip ds000221_sub-010006.zip
Note: you can also clone the full dataset with OSF. This will create a
datafolder at the root of the repository. Since the command clones the entire repository, this may be quite large and take a while to download.osf -p cmq8a clone ./data
Extra steps
Test the installation
Installation information for a package can be checked by pip from the bash terminal:
pip show dipyYou can also see the packages and versions of all
pip-installed dependencies by typing:pip freezeYou can also imported the library in Python by running a python terminal:
pythonand then import the module:
import dipyAlternatively, the package version can also be checked by running, for example:
import dipy
print(dipy.__version__)
Make sure you are in the root of Intro_to_dMRI_workshop, and start the notebook server to run the notebook with JupyterLab.
jupyter-lab
In either case, the commands will print some information about the notebook server in the terminal, and a web browser will be opened to the URL of the web application (by default, http://127.0.0.1:8888). The users will be presented with the directory structure of the current directory, and they will be able to run the notebook of interest.
Exercise
Read through the notebooks running all the cells
Complete the exercises in the notebooks
Exercise 1 Get a list of all diffusion data in NIfTI file format (
01_introduction notebook).Exercise 2 Plot the axial and radial diffusivity maps of the example given. Start from fitting the preprocessed diffusion image (
03_diffusion_tensor_imaging notebook).Exercise 3 Simulate the ODF for two fibre populations with crossing angles of 90, 60, 45, 30, and 20 degrees. We have included helpful hints and code to help you get started (
04_constrained_spherical_deconvolution notebook).Exercise 4 Repeat the tractography, but apply a binary stopping criteria (BinaryStoppingCriterion) using the seed mask. Visualize the tractogram (
05_deterministic_tractography notebook)!Exercise 5 Set the color of the streamlines to display the values of the FA map and change the opacity to 0.05 (
05_deterministic_tractography notebook).
Follow up with your local TA(s) to validate you completed the exercises correctly.
🎉 🎉 🎉 you completed this training module! 🎉 🎉 🎉
More resources
- For additional information about
Pythonsetups besides the package manuals, users are encouraged to read the Programming with Python Carpentries lesson. - Other great resources to get started with dMRI:
- DIPY website, including documentation and tutorials.